Every day, millions of people search YouTube for tutorials—how to edit a photo, how to code a website, how to use a software feature. Tutorial videos are the backbone of online learning, and creating them well can establish you as an authority, grow your audience, and even generate income.
But there's a big difference between recording your screen and creating a helpful tutorial. This guide covers everything you need to know to create tutorials that people actually watch, learn from, and share.

Why Create Tutorial Videos?
Before we dive into the how, let's understand the why. Tutorial videos offer unique benefits for content creators:
High Search Intent = Consistent Traffic
Tutorial videos rank well in search because they answer specific questions. Someone searching "how to crop video in Premiere Pro" has clear intent—they want to learn. Your tutorial can capture that traffic for years.
- Evergreen content: A well-made tutorial can get views for 5+ years
- SEO benefits: YouTube and Google both surface tutorial content
- Compound growth: More tutorials = more discoverability
Build Trust & Authority
When you teach someone something useful, they remember you. This builds trust far more effectively than promotional content. Viewers who learn from your tutorials are more likely to:
- Subscribe to your channel
- Recommend you to others
- Purchase your products or courses
- Engage with your other content
Multiple Revenue Opportunities
Tutorial content opens several monetization paths:
| Revenue Stream | How It Works | Potential |
|---|---|---|
Ad Revenue |
YouTube Partner Program ads |
$2-5 per 1,000 views |
Affiliate Links |
Software/product recommendations |
5-30% commissions |
Sponsorships |
Brand partnerships |
$500-10,000+ per video |
Courses |
Sell advanced training |
$50-500+ per sale |
Planning Your Tutorial
The difference between a mediocre tutorial and a great one often comes down to planning. Here's how to set yourself up for success.
Choosing the Right Topic
Not all tutorial topics are created equal. The best topics have these characteristics:
1. Specific Problem, Clear Solution
Bad: "How to Use Photoshop"
Good: "How to Remove Backgrounds in Photoshop in 3 Clicks"
Specific topics rank better, convert better, and are easier to produce. Aim for tutorials that solve one specific problem completely.
2. Proof of Demand
Before creating, verify people are searching for your topic:
- YouTube Search: Start typing your topic—do suggestions appear?
- Google Trends: Is interest steady or growing?
- Competitor Videos: Are existing tutorials outdated or low quality?
- Comments: What questions do people ask on related videos?
3. Your Expertise Level
You don't need to be the world's expert, but you should know more than your target audience. If you just learned something yesterday, that's actually perfect—you remember the confusion points and can explain clearly.
Understanding Your Audience
Who's watching? Your answer shapes everything:
| Audience | Style | Pacing |
|---|---|---|
Beginners |
Simple language, more explanation |
Slower, step-by-step |
Intermediate |
Mix of simple & technical terms |
Moderate, skip basics |
Advanced |
Technical language OK |
Fast, focus on tips |
Scripting vs. Outlining
Should you write a full script or just outline? It depends on your style:
Full Script (Recommended for Beginners)
Write everything you'll say word-for-word. Pros: No rambling, precise timing, easier editing. Cons: Can sound robotic if not delivered naturally.
Bullet Outline (Better for Experienced Creators)
List key points and talk through them naturally. Pros: More conversational, faster prep. Cons: May need more takes, risk of tangents.
Pro Tip: For software tutorials, I recommend a hybrid approach: script your intro and outro, then use bullet points for the main walkthrough. This gives you a polished beginning/end while keeping the middle natural.
Equipment You Need
You don't need expensive gear to create great tutorials. Here's what actually matters.
Microphone Quality (Most Important)
People will tolerate mediocre video quality, but bad audio makes them click away. Audio quality is the single most important technical factor.
Budget Options ($20-50)
- USB Lavalier: BoY BY-M1 (~$15) — surprisingly good for the price
- USB Desktop: Blue Snowball Ice (~$40) — classic beginner mic
Mid-Range ($100-200)
- Blue Yeti: Versatile, built-in headphone monitoring
- Audio-Technica AT2020USB+: Cleaner sound than Yeti
- Rode NT-USB Mini: Compact, great quality
Pro Level ($300+)
- Shure SM7B + Interface: Industry standard for podcasts
- Rode PodMic + Interface: Excellent value for professional sound
Quick Win: Before buying anything, improve your current audio by: (1) Recording in a quiet room with soft furnishings, (2) Getting close to your mic (6-8 inches), (3) Using software noise reduction in post.
Screen Recording Software
Your screen recorder is your primary production tool. Here's what to look for:
Essential Features
- High quality recording: 1080p minimum, 4K preferred
- Low performance impact: GPU encoding to avoid lag
- Audio separation: Record system audio and mic on separate tracks
- Webcam overlay: Picture-in-picture for facecam
- Mouse highlighting: Automatically highlight clicks and cursor
Recommended Software
| Software | Price | Best For |
|---|---|---|
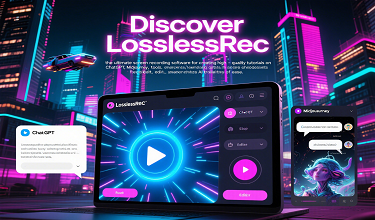
LosslessRec |
$39.95 |
Tutorials, gaming, one-time purchase |
OBS Studio |
Free |
Streaming, advanced users |
Camtasia |
$299 |
Built-in editing suite |
Loom |
Free/$12.50/mo |
Quick videos, team sharing |
Why LosslessRec works well for tutorials: GPU hardware encoding means no lag while recording complex software. The one-time purchase (vs. subscription) makes it cost-effective for creators. Multi-track audio lets you adjust game/system audio and voiceover separately during editing.
Webcam (Optional but Recommended)
Showing your face builds connection and trust. For tutorials, you don't need 4K—clear 1080p is plenty.
Good Options
- $50-80: Logitech C920/C922 — The classic choice, reliable 1080p
- $100-150: Logitech C930e / Razer Kiyo — Wider angle, better low light
- $200+: Elgato Facecam / Logitech Brio — High-end, great quality
Webcam Tips
- Position camera at eye level (not looking down at you)
- Light your face from the front, not behind you
- Use a clean, uncluttered background
- Look at the camera, not the screen, when talking
Recording Your Tutorial
With planning done and equipment ready, it's time to record. Here's how to get clean, professional recordings.
Before You Hit Record
- Close unnecessary applications: Reduces distractions and system load
- Turn off notifications: Nothing ruins a take like a popup
- Prepare your workspace: Open all files, websites, and tools you'll need
- Test your audio: Record 30 seconds and check levels
- Clear your desktop: Hide icons and use a clean wallpaper
Recording Best Practices
Record in Sections
Don't try to do everything in one take. Break your tutorial into logical sections:
- Introduction (can be recorded last)
- Step 1, Step 2, Step 3...
- Conclusion / Summary
This makes editing easier and reduces the impact of mistakes.
Speak Clearly and Energetically
Your voice should be slightly louder and more animated than normal conversation. This isn't fake—it's necessary because:
- Listeners are more distracted than face-to-face
- Screen content competes for attention
- Energy translates poorly through recording
Show, Don't Just Tell
Every instruction should have visual accompaniment:
- Click the button while saying "click the button"
- Highlight important areas (mouse effects help)
- Pause briefly after important steps for viewers to process
Handle Mistakes Gracefully
When you mess up, don't stop recording. Instead:
- Pause for 2 seconds
- Repeat the sentence from the beginning
- Continue recording
The pause makes it easy to find and cut mistakes during editing.
Optimal Recording Settings
| Setting | Recommended | Why |
|---|---|---|
Resolution |
1920x1080 (1080p) |
YouTube standard, good file size |
Frame Rate |
30fps |
Smooth for tutorials, smaller files |
Encoder |
GPU (NVENC/QuickSync) |
No performance impact |
Bitrate |
10-15 Mbps (CQP 20-23) |
High quality, manageable files |
Audio |
48kHz, 16-bit, AAC |
YouTube standard |
Editing for Engagement
Raw recordings need editing to become polished tutorials. Here's what to focus on.
The 80/20 of Tutorial Editing
You don't need fancy effects. Focus on these essentials:
1. Cut the Fluff
Remove:
- Long silences and "umms"
- Repeated sentences (from mistakes)
- Unnecessary loading/waiting screens
- Tangents that don't add value
2. Add Context
- Title cards: "Step 1: Setting Up" helps viewers follow
- Zoom highlights: Draw attention to specific UI elements
- Callouts: Text overlays for keyboard shortcuts or key points
3. Enhance Audio
- Apply noise reduction to remove background hum
- Normalize audio levels (target -14 to -16 LUFS for YouTube)
- Add subtle background music at -20dB or lower
Editing Software Options
| Software | Price | Best For |
|---|---|---|
DaVinci Resolve |
Free |
Professional editing, color grading |
CapCut |
Free |
Quick edits, easy effects |
Adobe Premiere |
$22.99/mo |
Industry standard, full workflow |
Camtasia |
$299 |
>All-in-one record + edit |
Optimal Video Length
How long should your tutorial be? Long enough to cover the topic completely, short enough to maintain attention.
- Quick tips: 2-5 minutes — single technique or feature
- Standard tutorials: 8-15 minutes — complete walkthrough
- Deep dives: 20-40 minutes — comprehensive guides
Watch time is YouTube's key metric. A 10-minute video with 70% retention beats a 5-minute video with 40% retention.
Publishing & Optimization
Your tutorial is edited and ready. Now optimize it for discovery.
Title Optimization
Your title is the #1 factor for click-through rate (CTR). Good titles:
- Include the problem: "How to [do thing] in [software]"
- Add specificity: "in 5 Minutes" or "2026 Guide" or "Beginner Friendly"
- Front-load keywords: Put the most important words first
- Stay under 60 characters: So they don't get cut off in search
Title Examples
Bad: "Photoshop Tutorial"
Better: "How to Remove Background in Photoshop"
Best: "Remove Background in Photoshop - 3 Easy Methods (2026)"
Thumbnail Design
Thumbnails matter more than titles for clicks. Best practices:
- Show the outcome: Before/after split works great
- Use contrasting colors: Stand out from the background
- Add minimal text: 3-5 words max
- Show your face: Faces increase CTR by ~30%
Description & Tags
Your description should:
- Start with a compelling first sentence (shows in search)
- Include relevant keywords naturally
- Have timestamps for key sections
- Link to related resources
Example Timestamp Format
0:00 Introduction
0:45 What You'll Need
1:30 Step 1: Download and Install
3:15 Step 2: Configure Settings
5:00 Step 3: Record Your Screen
7:30 Editing Tips
9:45 Export and Upload
Pro Tips for Better Tutorials
1. Create a Series
Instead of one long tutorial, create a series of shorter, focused videos. This:
- Increases total watch time across multiple videos
- Improves SEO (more videos = more discoverability)
- Lets viewers skip what they already know
- Creates playlist opportunities
2. Update Old Tutorials
Software changes. When your tutorial becomes outdated:
- Add an update note and timestamp in the description
- Pin a comment with the changes
- Create a new, updated version (link from old video)
3. Engage in Comments
Answer questions in your video comments. This:
- Signals to YouTube that the video is valuable
- Provides additional value (Q&A becomes part of the content)
- Reveals ideas for future tutorials
4. Repurpose Content
One tutorial can become multiple pieces of content:
- Full video → YouTube
- Short clips → TikTok, Reels, Shorts
- Transcript → Blog post
- Key frames → Social media graphics
- FAQs → Community posts
Frequently Asked Questions
1. Do I need to show my face in tutorials?
Not required, but recommended. Facecam builds connection and trust. If you're uncomfortable, start without it—you can always add it later. Many successful channels never show faces.
2. What if I make a mistake while recording?
Don't stop! Pause for 2 seconds, then repeat the sentence. The pause makes it easy to find and cut during editing. Professional creators rarely do perfect single takes.
3. How do I record system audio and my voice separately?
Use a screen recorder that supports multi-track audio. LosslessRec and OBS both offer this. In post-production, you can adjust game/system audio and voiceover independently.
4. Should I script every word or use bullet points?
For beginners: script everything. It ensures you cover all points and keeps videos concise. For experienced creators: bullet points work well and sound more natural. Many use a hybrid—script intro/outro, outline the middle.
5. What's the best length for a tutorial?
As long as needed, as short as possible. Aim for 8-15 minutes for most topics. YouTube analytics will tell you where viewers drop off—if you see consistent drop-offs, that section may be too long or boring.
6. How do I grow my tutorial channel?
Consistency and SEO are key:
- Publish on a regular schedule (even once every 2 weeks)
- Create tutorials for specific, searchable problems
- Optimize titles, thumbnails, and descriptions
- Respond to comments to build community
- Link videos in playlists and end screens
7. What equipment do I actually need to start?
Minimum: A decent USB microphone ($40-100) and free screen recording software (OBS or built-in Windows recorder). You can create professional tutorials without a webcam, lighting setup, or expensive editing software. Upgrade as you grow.