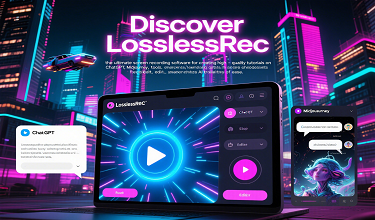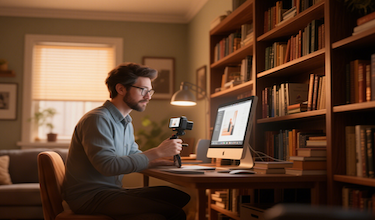

In the digital era, the need to create screencasts on Windows 10 has become increasingly prevalent. Whether you're a teacher preparing online lessons, a software developer demonstrating a new application, or a content creator sharing your gaming adventures, having a reliable screen recorder is essential. Among the plethora of options available, LosslessRec stands out as the best screen recorder for Windows 10, offering an array of features that make screencast creation a breeze.

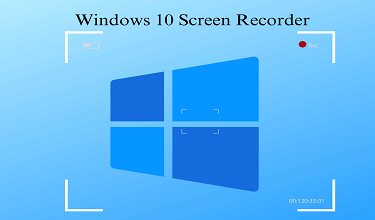
Why Windows 10 Users Need a Great Screen Recorder
Windows 10 is one of the most widely used operating systems globally. Its users engage in a diverse range of activities that often require screen recording. For instance, business professionals might need to record webinars or software tutorials for training purposes. Students could use it to capture online lectures for later review. However, not all screen recorders are created equal, and finding one that meets the specific needs of Windows 10 users can be a challenge.
Limitations of Other Screen Recorders
Many screen recorders available for Windows 10 come with limitations. Some free versions are plagued with watermarks, which can be unprofessional and distracting, especially for commercial or educational use. Others may have a restricted recording time, forcing users to stop and restart recordings multiple times, disrupting the flow of the content. Additionally, some screen recorders may not offer high - quality output, resulting in blurry visuals or poor - quality audio.
Why LosslessRec is the Best for Windows 10 Screencasts
1. User - Friendly Interface
LosslessRec is designed with simplicity in mind. Even if you've never recorded a screencast before, you'll find its interface easy to navigate. The main window presents all the essential recording options in a clear and organized manner. You can quickly select the area of the screen you want to record, choose your audio source (whether it's the system sound, microphone, or both), and start or stop the recording with just a couple of clicks.
2. High - Quality Recording
When it comes to screencasts, the quality of the recording is paramount. LosslessRec ensures that your visuals are captured in high definition, with sharp details and smooth transitions. Whether you're recording a fast - paced gaming session or a detailed software demonstration, every element on the screen is accurately represented. The audio recording is also top - notch, eliminating background noise and ensuring clear sound reproduction.
3. Flexible Recording Modes
LosslessRec offers multiple recording modes to suit different needs. You can record the entire screen, which is great for capturing full - screen applications or presentations. If you only need to focus on a specific window, such as a browser window or a particular software interface, the window - recording mode is perfect. Additionally, you can define a custom - sized recording area, giving you complete control over what is included in the screencast.
4. Annotation and Webcam Integration
Enhancing your screencast with annotations can make it more engaging and informative. LosslessRec allows you to add text, arrows, shapes, and highlights during the recording process. This is especially useful for pointing out important details or providing explanations. Moreover, if you want to include your webcam footage in the screencast, perhaps for a face - to - face introduction or to show your reactions, LosslessRec makes it easy to do so. You can adjust the size and position of the webcam window to fit seamlessly with the screen recording.
5. No Watermarks or Time Restrictions
One of the most frustrating aspects of some screen recorders is the presence of watermarks and time restrictions. LosslessRec eliminates these annoyances. You can record for as long as you need without any interruptions, and there are no unsightly watermarks on your final screencast. This makes it suitable for professional use, as well as for personal projects.
Step-by-step guide to Creating Screencasts with LosslessRec on Windows 10
Step 1: Download and install the software
First, download the Windows installation file, run the installation file and follow the on-screen instructions. The installation process is fast and intuitive, even for users with little technical knowledge.
Step 2: Setting Up the Recording
aunch LosslessRec
Once installed, open the application. You'll be greeted with the main interface. Select the Recording Area If you want to record the entire screen, click the “Full Screen” option. For a specific window, click “Window” and then select the desired application window from the list. To define a custom area, click “Custom” and drag the cursor to outline the area you want to record. Choose the Audio Source Decide whether you want to record system sound, microphone sound, or both. You can adjust the volume levels for each source within the audio settings. If you're using a microphone, make sure it's properly connected and recognized by Windows 10. Step 3: Starting the Recording Enable Annotations and Webcam (Optional) If you plan to use annotations, click the annotation icon to access the annotation tools. You can choose from different shapes, colors, and text options. To include your webcam, click the webcam icon and adjust the settings such as the webcam's position, size, and video quality. Start Recording Once you're satisfied with all the settings, click the “Record” button. You'll have a short countdown to prepare yourself. Step 4: Stopping and Saving the Screencast Stop the Recording When you've finished recording your screencast, click the “Stop” button. LosslessRec will process the recording briefly. Preview and Save You can preview the recording to check for any errors or areas that need improvement. Once you're happy with the result, click the “Save” button. You can choose the file format for your screencast (LosslessRec supports popular formats like MP4), and specify the location on your Windows 10 computer where you want to save the file. For Windows 10 users looking to create high - quality, professional - looking screencasts easily, LosslessRec is the clear choice. Its user - friendly interface, high - quality recording capabilities, flexible recording modes, and additional features like annotation and webcam integration make it stand out from the competition. Say goodbye to the limitations of other screen recorders and start creating engaging screencasts today with LosslessRec.Conclusion